
After you have bought the WD My Book Live Network Drive you must setup your personal cloud cause its freeeee
And its so easy to do.
First make sure you have connected the network drive to your router using a regular network cable. The drive is powered on and the small
LED on the front of drive is showing green.
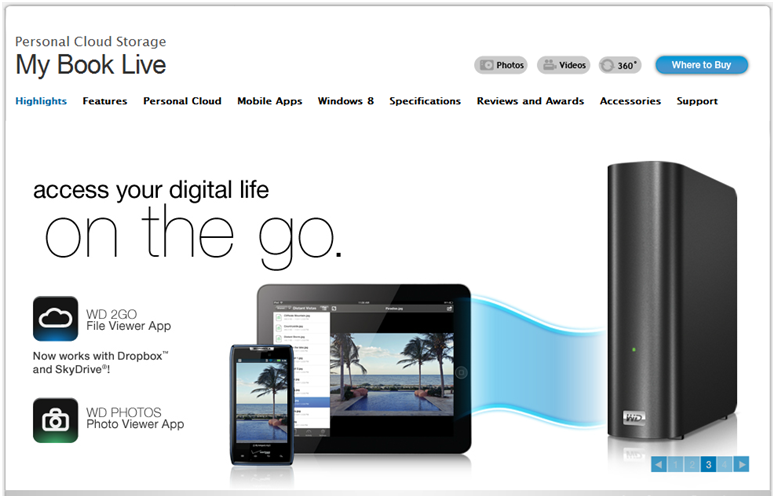
Follow the steps below to setup your own 2TB personal cloud for your mobile devices.
Step 1: Install “WD 2 go” APP
To setup your personal cloud, first you need to install a free app in your mobile device: WD 2go
Here is a link for the android app(https://play.google.com/store/apps/details?id=com.wdc.wd2go&hl=en)
For your iPhone, simply search for “wd 2 go”.
Step 2: Create an user account in your My Book Live
Open up your browser (firefox/Chrome) and go to http://mybooklive/UI/
This is the WD Mybook Live Control Panel UI
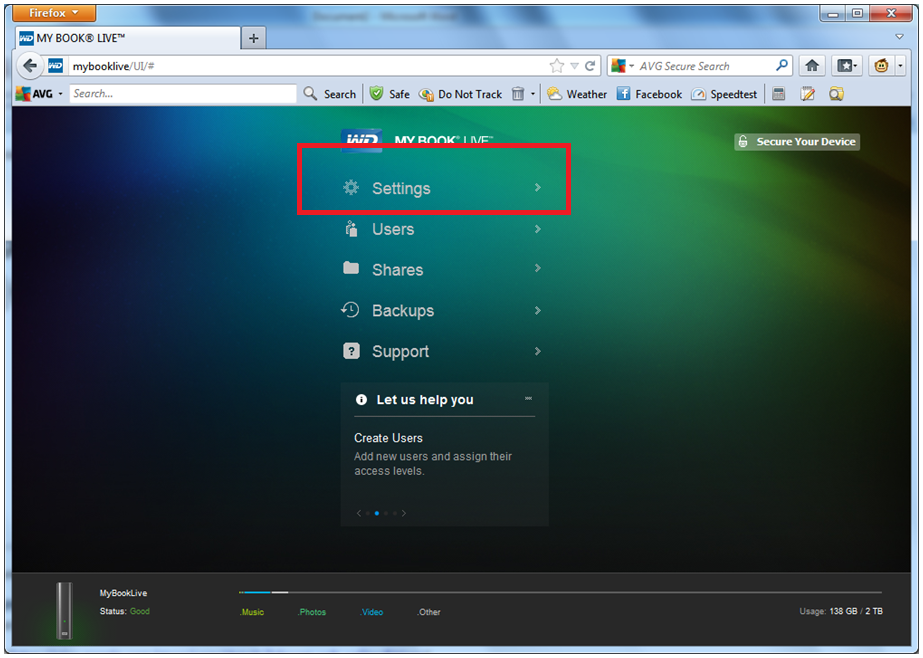
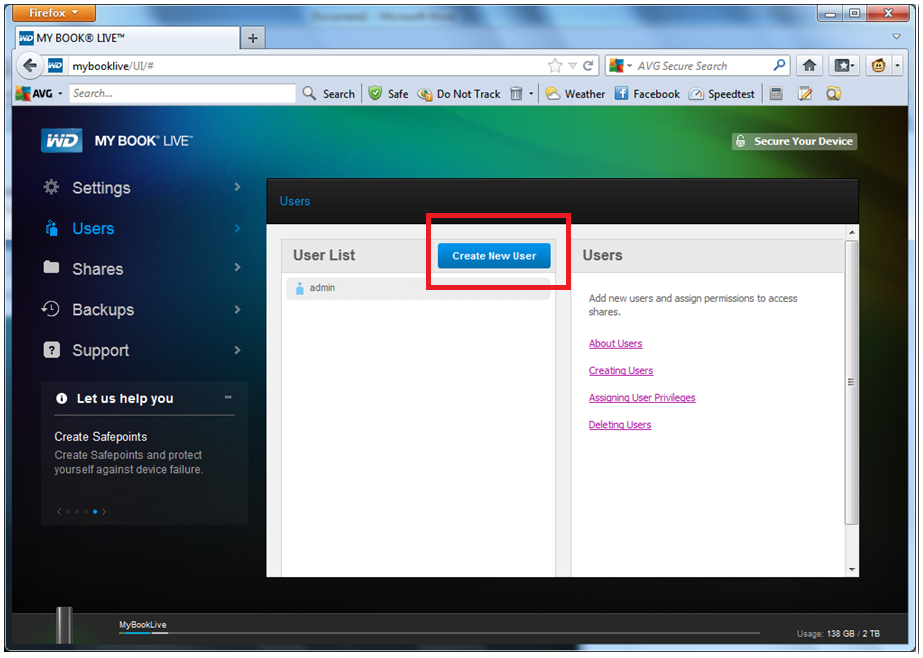
Now go to the “Users” menu and click on the “Create New User” button to create a new user account.
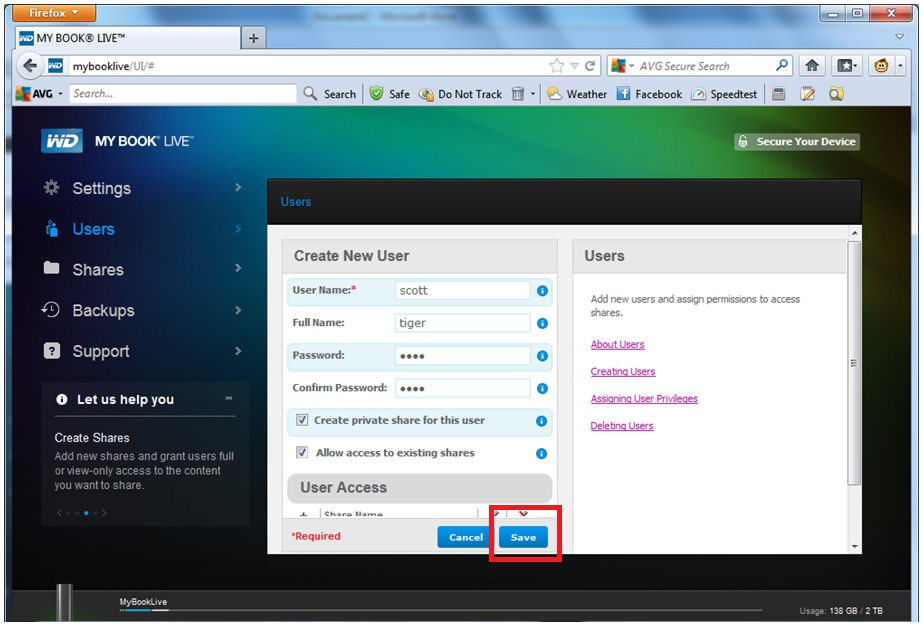
Fillup the account creation form and click Save when done.
Step 3: Give mobile access to the user
While you are in the mybook live control panel UI, go to “Settings” > Remote Access
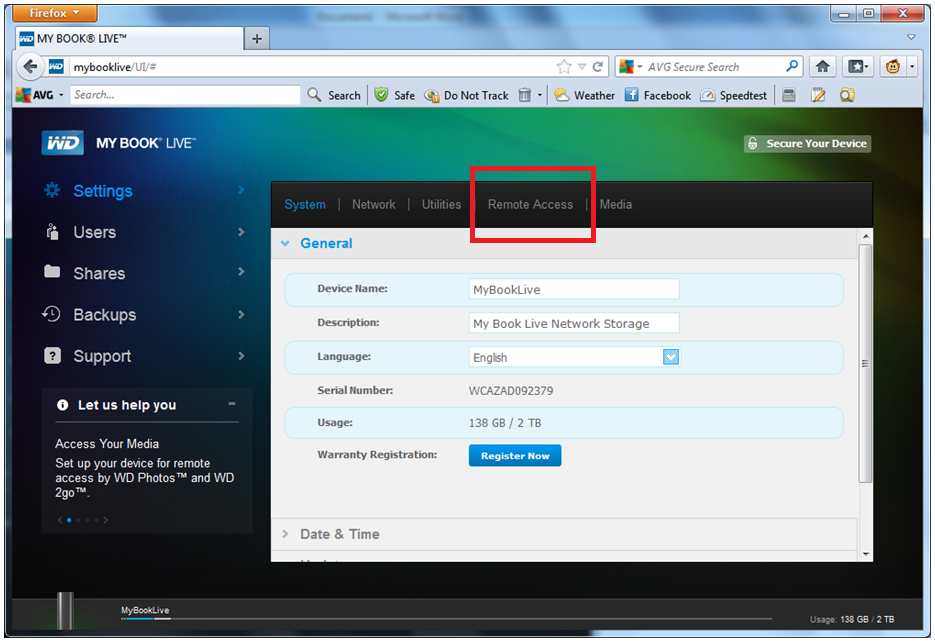
In the “Remote Access” tab make sure remote access is “Enabled”. Then click on “Mobile Access” panel
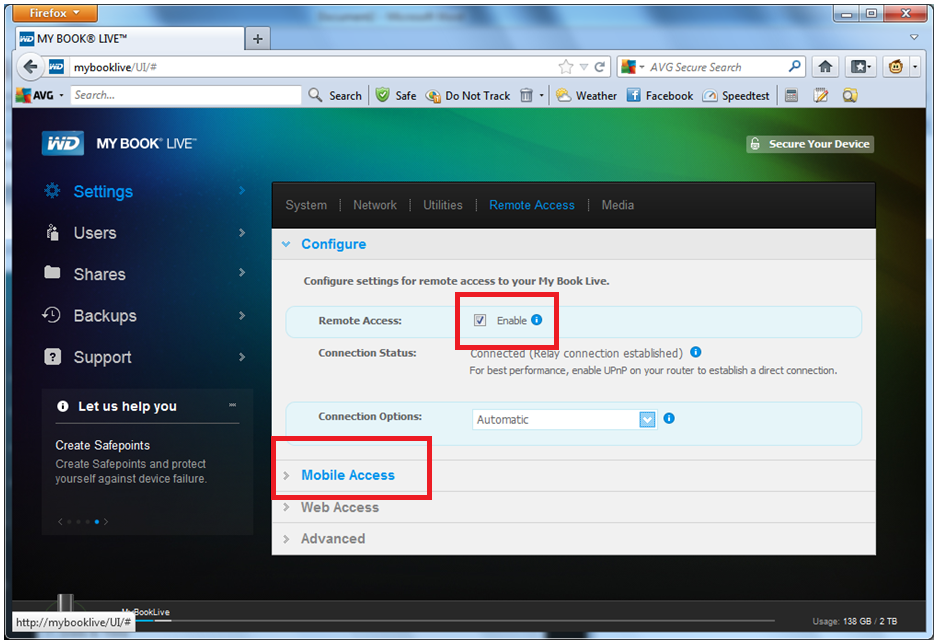
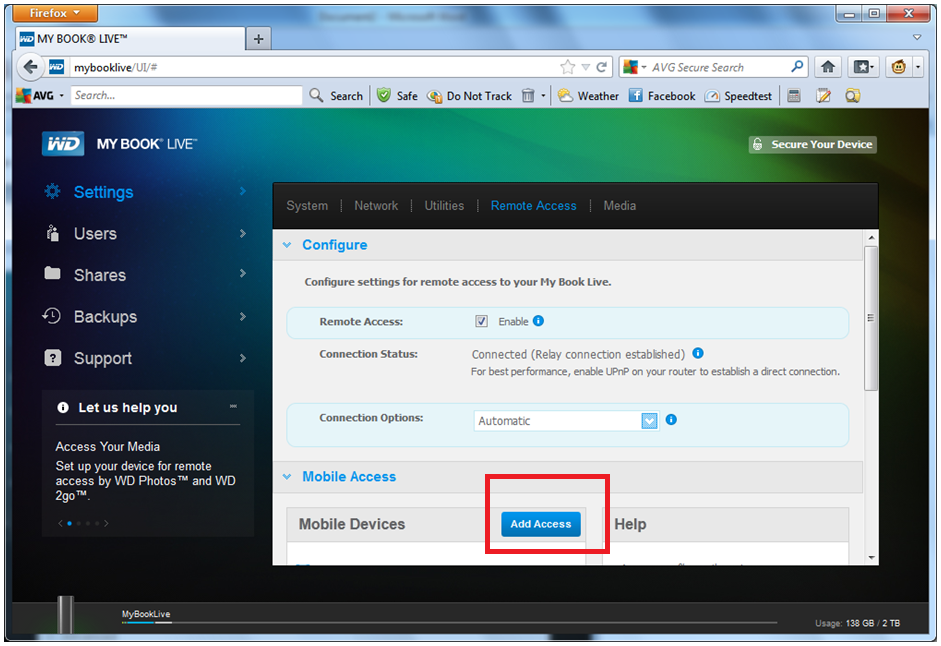
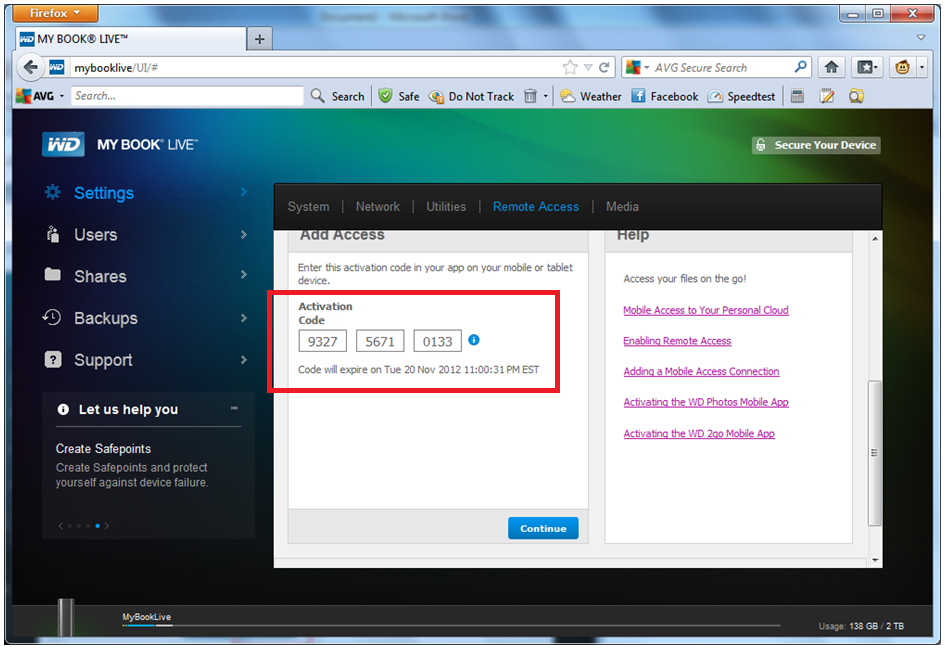
Now Click on the “Add Access” button
Select a user from the dropdown list and then click the “Get Code” button. (In the future you can assign multiple access to a single user)
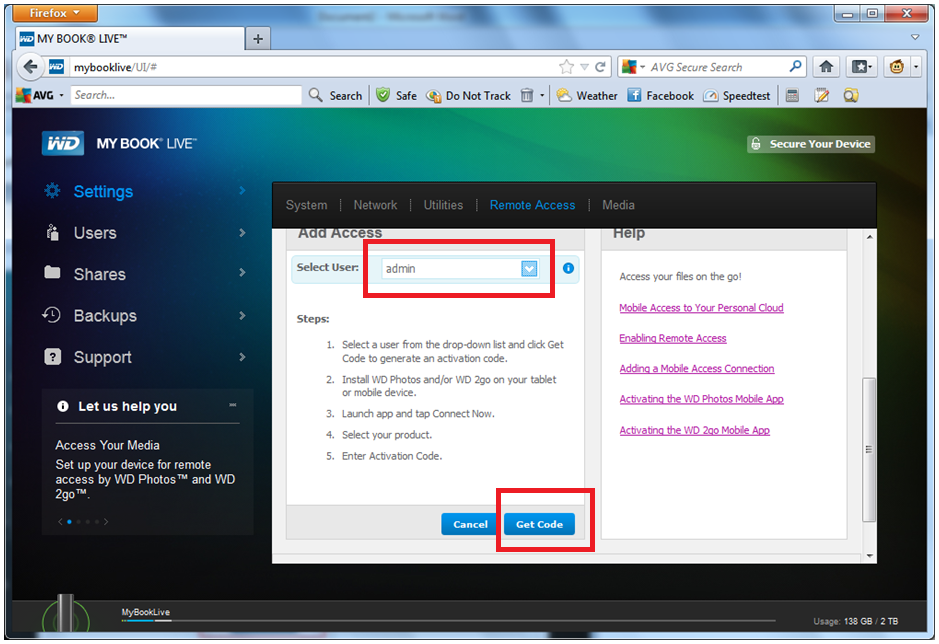
It would show you the activation code:
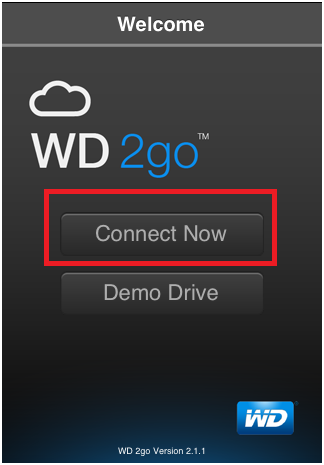
Step 4: Connect from Mobile Device
Now from your mobile device open the WD2 Go App and click on Connect Now.
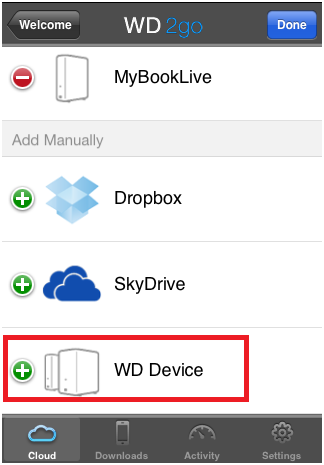
Click on the (+) icon next to “WD Device” and
(If you have a device already recognized just delete and
Go to “Add Manually”)
enter the activation code from above.
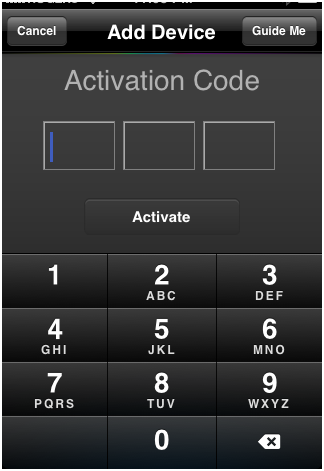
At this point you should be good to go.
Step 5 (optional): Opening up your Router’s Port
If however, you get a message that says: “Device Offline – This Device is Inaccessible; only local files are available”
then it may be that your router’s port are not open for WD access.
In order to open the ports you need to open go to WD Mybook Live Control Panel UI>Settings>Remote Access
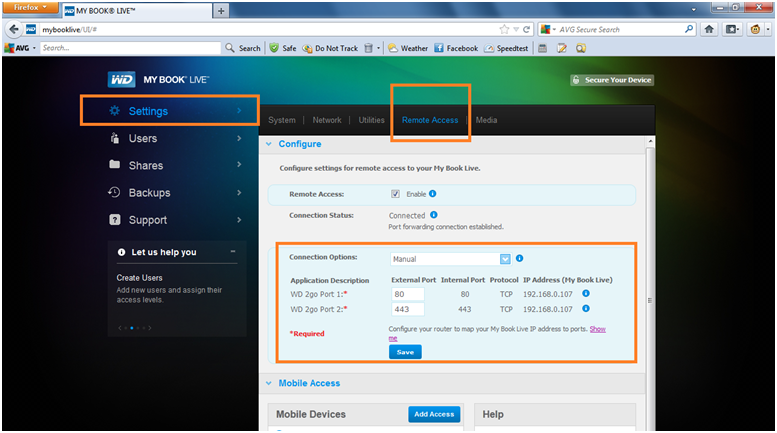
Write down the IP Address, External Port, Internal Port and Protocol
As per the default settings, we need to open: 80 and 443
Now go to your router’s control panel (generally its http://192.168.0.1/).
Log in to your router and go to “Virtual Server”
(I have a D-Link router and “Virtual Server” is the place where you generally open the port.
If you have a different router it may be named differently. Whatever the name, it should show you “Private Port” and “Public Port”)
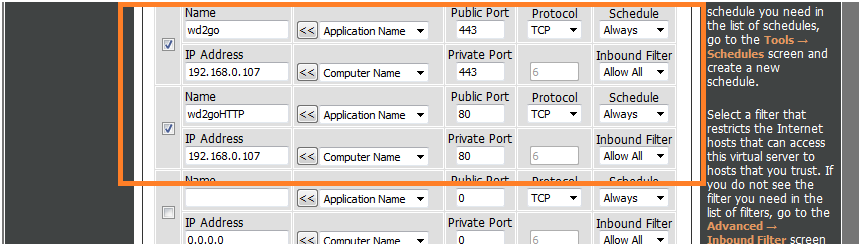
Now enter the port and IP address that you noted down and click Save. Now you should be able to access your drive from your mobile device.
sorry to bug you but i accidentally entered the wrong ip. is there a way to reset the mistake that i made? the drive mounts as a shared drive on my mac but I can’t connect to it at all because the ip is invalid. dang